Updated Working MethodEasy SetupUses SSH + SNI + PayloadCreate & Share Configs

How to Create Dark Tunnel Config Files (.dark) โ€“ Working Method 2026

Want to create your own working configs for Dark Tunnel? ๐Ÿ”ฅ In this guide, youโ€™ll learn the correct and updated method to create .dark config files using SSH accounts, SNI (Bug Hosts), and SSL/TLS Payloads.

D
By debosstbs
10 min read
How to Create Dark Tunnel Config Files Guide

1.Step 1: Download Dark Tunnel

Install the app from the Play Store:

Dark Tunnel

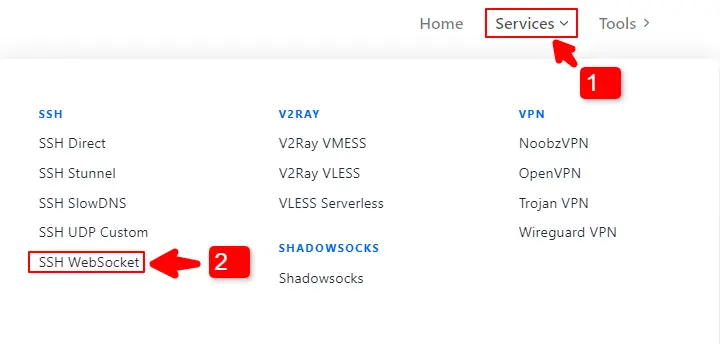
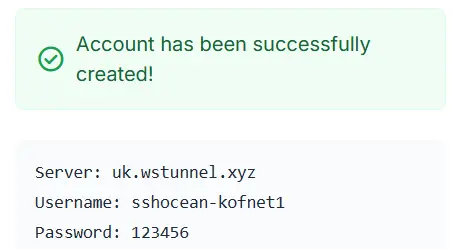
2.Step 2: Create an SSH Account

To connect, you need SSH credentials. Follow these steps:

Open your browser
Go to SSHOcean
Select SSH WebSocket
Select a server
Click Create Account
Copy these details: Host Name, Username, Password, SSL/TLS Payload
Copy SSH Account Details

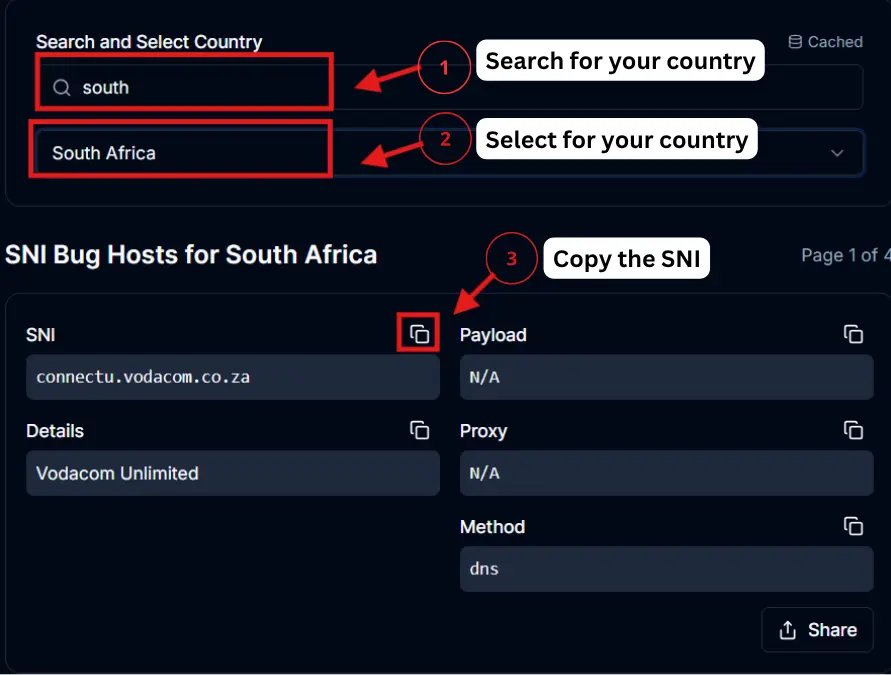
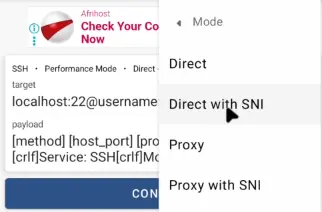
3.Step 3: Generate SNI (Bug Host)

Generate your SNI for your specific network:

๐Ÿ‘‰ Go to: snihost.com/sni-generator

1

Choose your country

2

Select your network ๐Ÿ“ถ

3

Generate SNI

4

Copy one of the generated SNIs

Generate SNI Bug Host

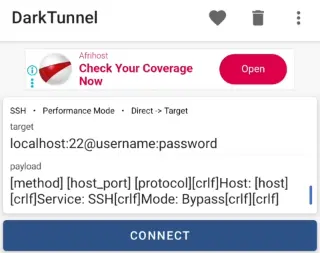
4.Step 4: Configure Dark Tunnel

Now letโ€™s configure everything correctly.

A. Open Configuration

Open Dark Tunnel
Tap the three-dot menu (top right)
Select: Inject Config
Tap Mode and choose: Direct with SNI
Select Direct with SNI mode

B. Edit Configuration Details

Now replace all default values with your own details:

Server / Host Name

Replace localhost with your SSH host

Port

443 (You can also try 80 if needed)

Username & Password

Enter your SSH username and password

SNI (Server Name Indication)

Paste the SNI you generated

Payload

Delete everything in the payload box, then paste the SSL/TLS Payload from SSHOcean.
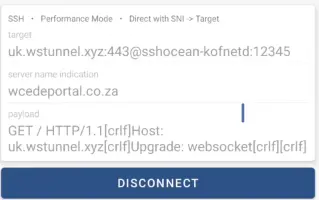
Paste Payload

5.Step 5: Connect

Now connect your configuration:

Tap CONNECT
Wait a few seconds

โœ” If successful, you are connected ๐ŸŽ‰

Connected successfully

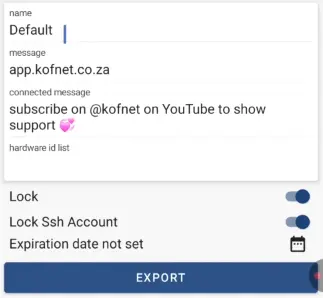
6.Step 6: Export and Save Config File (.dark)

Once your config is working, you can save and share it:

1

Disconnect from the app

2

Tap three-dot menu

3

Go to: Config โ†’ Export

4

Choose: File

5

Enter a file name

6

Click Export

โœ” Your .dark file is now saved

Export Dark Tunnel file

Troubleshooting

Not Connecting

  • Try another SNI
  • Use different SSH server
  • Check network signal

Slow Speed

  • Switch server
  • Try different config

No Internet

  • Regenerate SNI
  • Replace payload
  • Restart app

Pro Tips ๐Ÿ’ก

Always use fresh SSH accounts
Test before exporting
Use working SNIs only
Keep configs simple

Share Your Config

Once your config works:

  • Upload it to /files
  • Help others connect
  • Get ratings โญ
Upload Config

Is It Safe?

Using Dark Tunnel is safe if:

  • You use trusted sources
  • Avoid unknown configs
  • Test before sharing

Struggling to create your own files?

Download working Dark Tunnel files created by our community!

Conclusion

Creating Dark Tunnel config files is easy when you follow the correct steps:

Create SSH account
Generate SNI
Configure settings
Connect and test
Export file

More Dark Tunnel Guides

Frequently Asked Questions

Q: What is a .dark file?

A: A config file used in Dark Tunnel to connect to free internet.

Q: Which port should I use?

A: Port 443 is recommended for SSL/TLS connections.

Q: Why is my config not working?

A: Incorrect SNI, payload, or SSH details. Try replacing them or regenerating the SNI.

Q: Can I share my config?

A: Yes, after testing it to make sure it works, you can export and share it.