1.What You Need to Get Started
Creating your own config files for HA Tunnel Plus is one of the best ways to get stable and working free internet. Instead of depending on other people’s files, you can generate your own.
2. SNI Generator Tool
A tool to find working bug hosts for your specific network/country.
Use GeneratorCreator Pro Tips
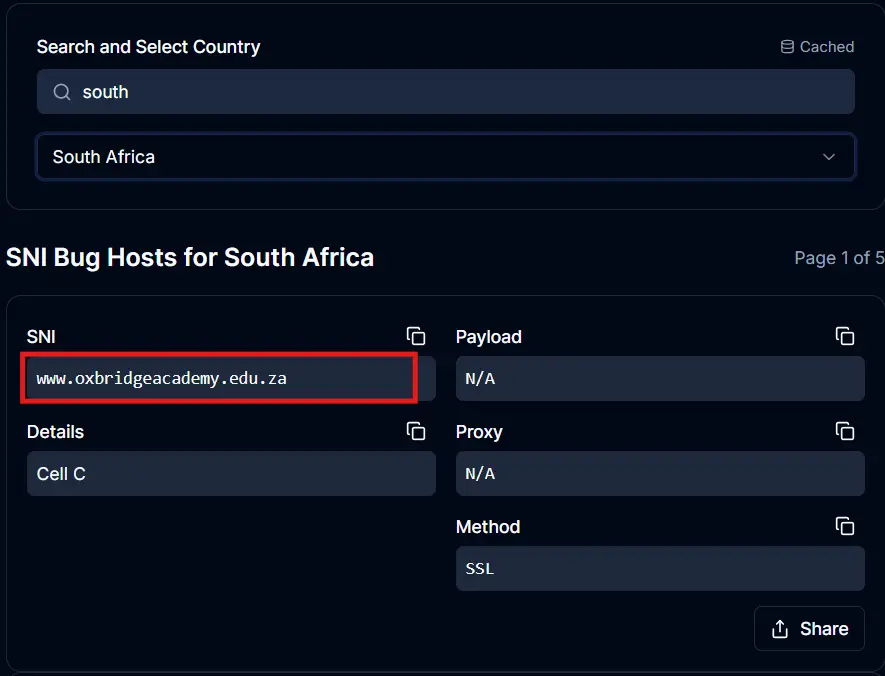
2.Step 1: Generate an SNI Bug Host
The first step is to find a working SNI (Server Name Indication). This is essentially a "bug host" that your network allows for free.
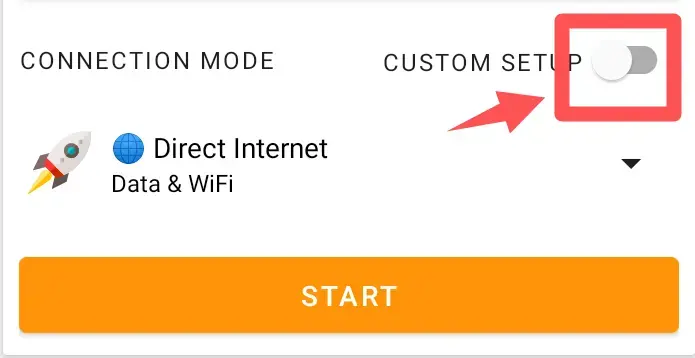
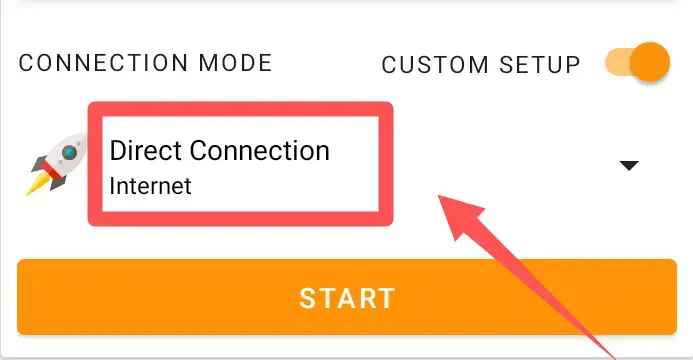
3.Step 2 & 3: Configure Custom Setup
Launch HA Tunnel Plus and switch to the Custom Setup mode.
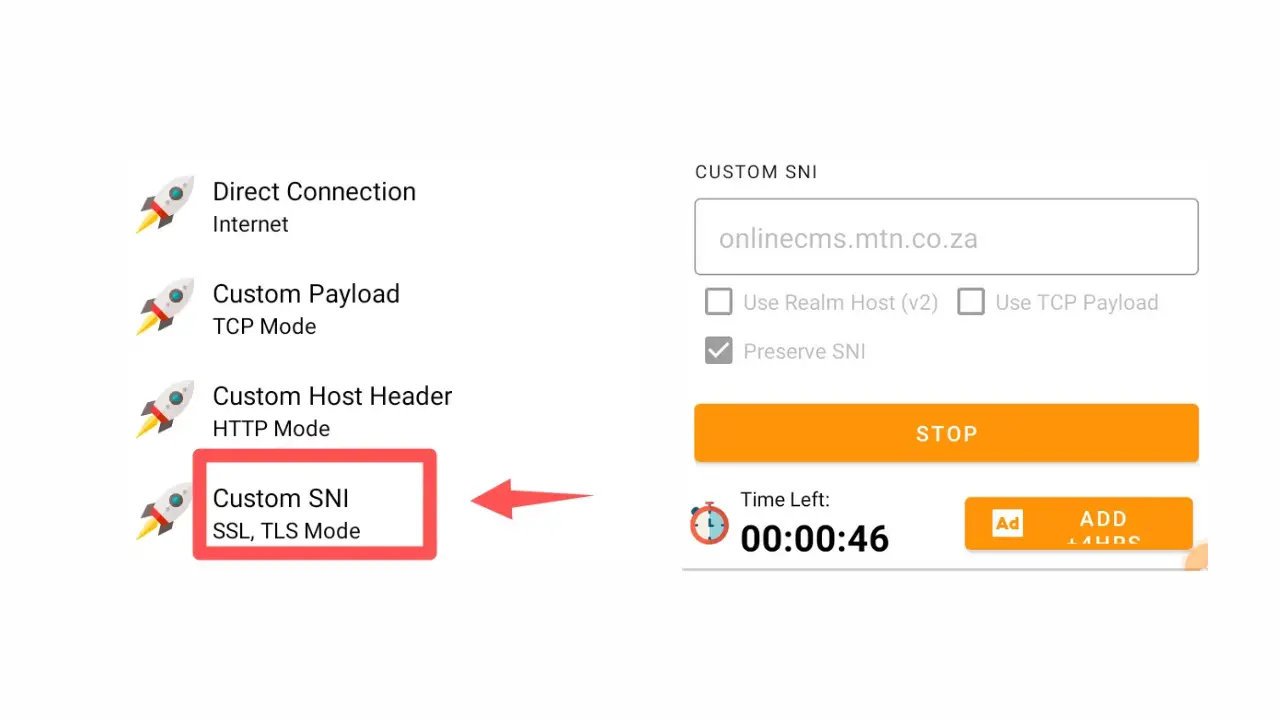
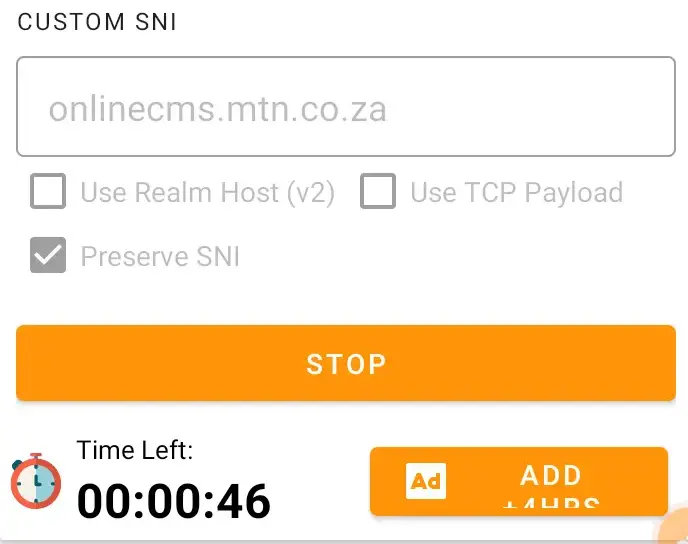
4.Step 4: Add Custom SNI
Now, paste the host you copied from the SNI generator into the app.
5.Step 5: Try Connecting
It's time to test if your SNI works without any extra settings.
Standard Connection Method
- Click START.
- Do NOT enable any extra options yet.
- Wait for the connection log.
✅ If it connects, you're done! Free internet is active.
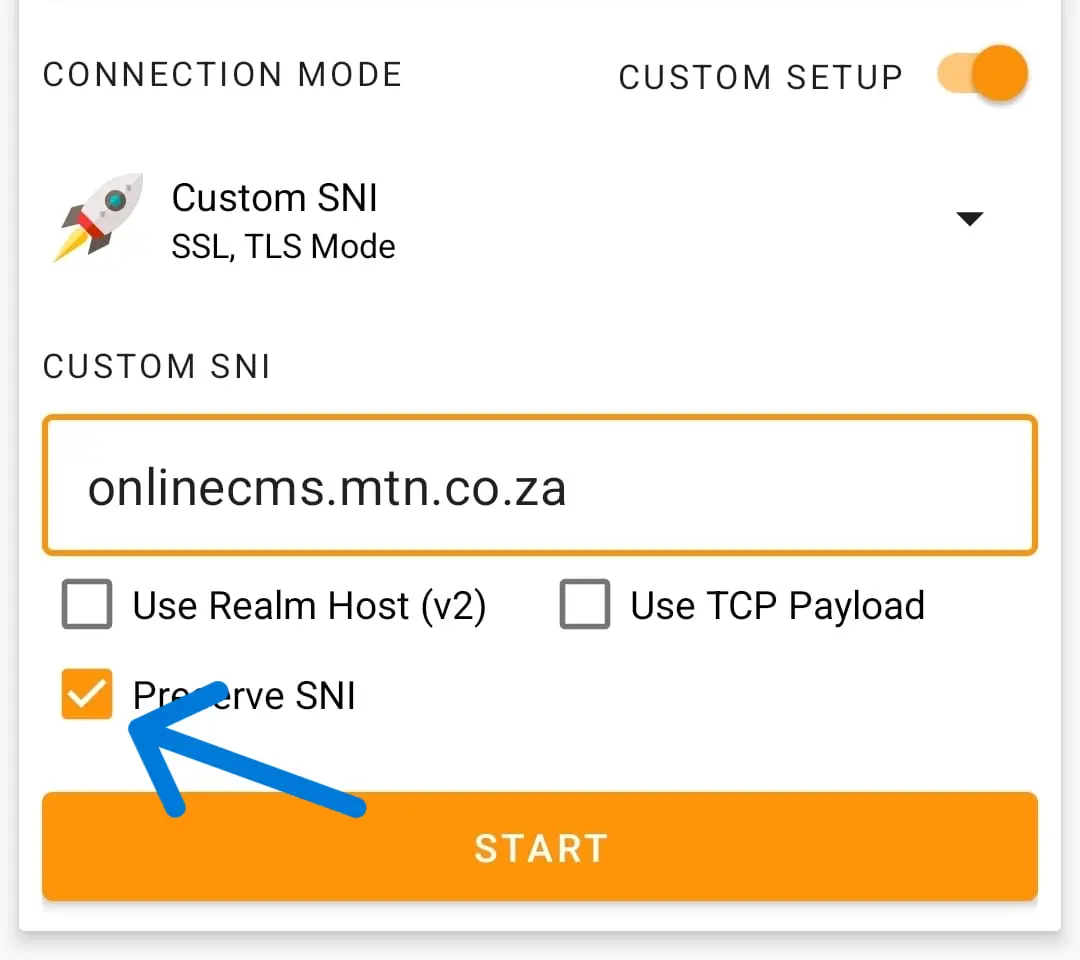
6.Step 6: Test Advanced Options
If the basic method fails, you need to test different combinations of advanced options. Every network is different!
Enable "Use Realm Host"
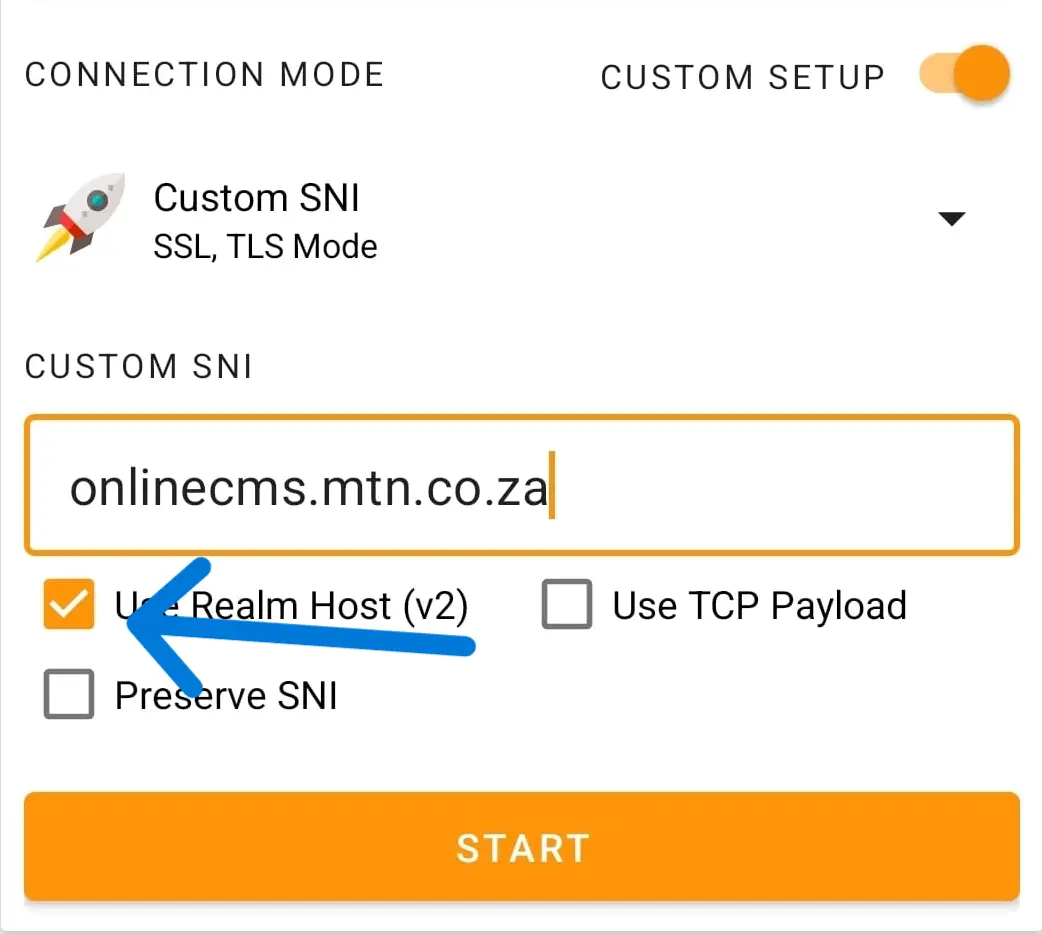
Enable "Use Realm Host" + "Preserve SNI"
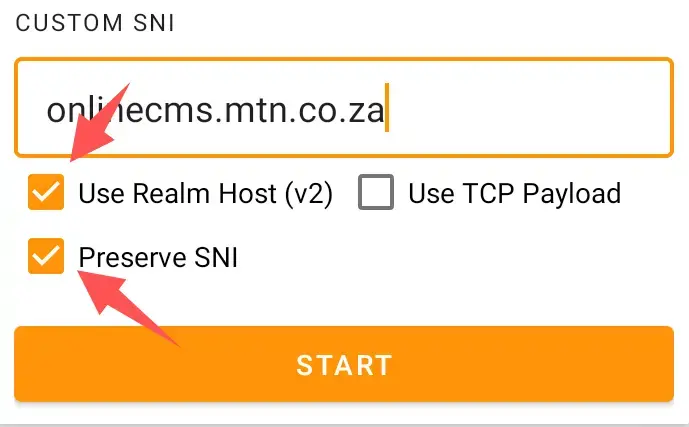
Enable "Preserve SNI" Only
✔ This option is often the most effective for modern 4G/5G networks.
7.Step 7 & 8: Browse and Save Config
Once connected successfully, keep the app running in the background. You can now browse the web freely!
Exporting your work (.hat)
- 1. Open the main menu (☰).
- 2. Tap Export Config.
- 3. Give your file a name (e.g., MTN-FREE-2026).
- 4. Tap Save.
Your file is now ready to share or use anytime!